Quote

"I cannot live without books: but fewer will suffice where amusement, and not use, is the only future object." -- Thomas Jefferson

Tuesday, September 22, 2020

My Favorite Yoga Poses

I love Yoga.

The Yoga practiced in the U.S. is a westernized version.

As a senior, Yoga helps keep me flexible, plus, there are many other benefits.

Yoga saved my life.

After a bad fall, I had difficulty walking. After taking several Yoga classes and practicing at home (with medical approval), my flexibility improved a lot. My walking gait is smoother, my back pain is less.

Plus, I like the emphasis on breathing and good posture.

 
These are my favorite Yoga poses / Asanas:
 
Mountain pose / Tadasana
 
Standing Forward Pose / Uttanasana
 
Corpse Pose (Supine Full Stretch) / Shavasana
 
Supine Butterfly / Supta Baddha Konasana
 
Shoulder Blade Pinch
 
Lower Back Press
 
Supine Twist Pose / Supta Matsyendrasana
 
Supine Knee-to-Chest / Apanssana
 
Knee-to-Chest Roll / Pawan Muktasana
 
Ab Crunches
 
Seated Butterfly / Baddha Konssana
 
Seated Forward Fold / Paschimottanasana
 
Twisted Sage Pose / Marichyasana III
 
Cat / Cow Pose / Marjaryasana
 
Baby Pose / Garbhasana


A few references:

https://www.yogabasics.com/practice/yoga-postures/supine-yoga-poses/

https://www.yogajournal.com/poses


DIY: Patterned Paper

My DIY Crafting Adventure: Plodding Along with Patterned Paper

For two days, I have been plodding from task to task filled with disappointment because my crafting / art skills are not improving fast enough.

Plus, I have watched so many DIY Craft YouTube videos, they’ve become a muddle in my brain.

My main focus, at the moment, is boxing and wrapping the items I have completed.

Making wrapping paper wasn’t high on my list but now I find that is what I need to do.

After a rough start, I actually made some decent patterned paper to use as wrapping paper.

My first attempt at patterned paper looked more like a Rorschach test.

This is ok, I like using a variety of different sized circles, just need to make some improvements like arrangement and color choice.

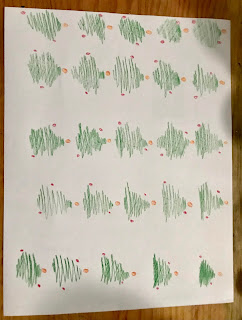
 While, I like this one, need to improve my tree doodle.


Almost got it with this one!

The previous three samples are an example of my craft supplies management. To conserve my permanent colored markers and acrylic paints, I dug out my colored pencils. They are fun to use!

On a positive note, my patterned paper disasters will be great for making paper beads!

Here are links to just two of the many DIY Patterned Paper YouTube videos I perused:

https://youtu.be/iuulm92pEv4

https://youtu.be/uyAcE12htMk


Reference:

https://en.m.wikipedia.org/wiki/Rorschach_test


Microwave: Mug O'Fried Rice & Egg Using Leftovers

Microwave: Mug O'Fried Rice & Egg Using Leftovers (LO)
 

Ingredients:

A Dab Vegetable oil
1 Egg
6 Tspns LO Cooked rice
1-3 Drops Hot sauce
2 Tspns Mozzarella cheese, shredded
Ground Black pepper, to taste
1 TBspn LO Canned salsa
1 TBspn LO Canned corn, drained and rinsed
A dollop of Milk
A dribble of Lime juice

 
Process:

Use a dab of oil to coat bottom and sides of mug.
Add remaining ingredients to the mug.
Whip and stir mixture thoroughly.
Microwave on high for 2 minutes.
Remove.
With a fork, check bottom of mug to make sure there is no uncooked liquid left. If so, microwave 30 seconds or more until all liquid has cooked.

Eat straight from the mug or use mixture to make a Toast Topping.

Sunday, September 13, 2020

No Bake - Refrigerator: Mug O’Chocolate Cream Cake


Now, when I look at an interesting recipe, I think, "Can I make this into a Mug Recipe?"

Lucky for me, with this recipe, you can make a mug version.


No Bake - Refrigerator: Mug O’Chocolate Cream Cake
(Adapted from: https://www.olivemagazine.com/recipes/baking-and-desserts/coffee-and-cream-fridge-cake/)


Pre-preparation:

Make 1/4 cup of strong coffee:
Add 2 heaping Tspns of instant coffee to 1/4 cup of hot water.
Stir.


Ingredients:

A dribble vegetable oil
5 oz light cream*
1.5 oz coffee concentrate
1 Tspn Chocolate milk powder mix and extra for garnish
2 Tspns confectioner sugar
1 Tspn Vanilla flavoring (optional)
Sugar cookies, crushed


Process:

In a measuring cup, add cream, coffee concentrate, chocolate powder, 2 Tspns confectioner sugar, and vanilla flavoring.
Mix thoroughly. 
Whip until it froths.

In a large mug, add vegetable oil, swirl oil to coat bottom and sides of mug.
Add a layer of some of the crushed sugar cookies.
Add a layer of some of cream mixture.
Repeat layers until mug is almost full
Make last layer cream mixture.
Chill overnight.

Prior to serving, sprinkle with chocolate milk powder and some crushed sugar cookies.


I liked it. It was creamy, cakey, chocolatey, and coffeey.

Next time, I won't crush the sugar cookies into crumbs, I'll keep them a little chunky.


*I struggle to understand the differences in creams.

 This is the light crema I used:


According to Spruce Eats, a light cream has 20% butterfat.

https://www.thespruceeats.com/understanding-different-kinds-of-milk-and-cream-3050535

Tuesday, September 8, 2020

Microwave: Mug O'Fettuccine

I had two remaining circles of spinach Fettuccine, so I decided to try to adapt a WW recipe to a mug recipe and after a second try, this recipe came out fairly well.

I had issues trying to boil the noodles, so I had to microwave the noodles one minute at a time. In my microwave, 2 minutes brings most liquids to a boil.


Microwave: Mug O’Fettuccine
(Adapted from: http://www.ww-recipes.net/2019/01/weightwatchers-)


Ingredients:

1 circle of Fettuccine
1 dab olive oil
Ground black pepper
3 TBspns canned mixed vegetables, drained
1-2 TBspns LO cooked chicken, diced
A dribble of Italian dressing


 Process:

Add circle of Fettuccine to mug.
Fill mug 3/4 with water.
Microwave in high 1-2 minutes at a time, depending on your microwave’s wattage.
Remove.
Add canned vegs.
Stir.
Fill mug 3/4 with water.
Add ground black pepper.
Stir.
Microwave 1-3 minutes in high.
Remove.
Drain, if necessary.
Add LO cooked chicken.
Stir well.
Add dressing.
Stir well.
Top with parm cheese.


DIY: Cardboard Earrings

DIY Cardboard earrings

Credit: https://youtu.be/f_UDijesb1A

I love the idea of making earrings from cardboard and Garlinda is so creative!

I jumped in.

My circles aren’t perfect but as I have learned, again, to learn a new task, it takes lots of practice and patience.

Garlinda’s idea of using a black magic marker to finish the edges of the discs was great.

Also, I need to remember to punch the hole in both earrings by holding them together.

Everything was going well until I got to making the punch hole and putting in the jump rings.

Then, my first pair of cardboard earrings project turned into a nightmare.

Like recipes, I never have all the ingredients or tools required. Use what you have is my approach.

I did not have a hole puncher. So, I used my wire twist earring-making tool as an awl.

While it worked well. Putting in two jump rings was almost impossible.

I have never been able to pry open a bit of a jump ring, easily, to add the earring hook. For this project, I had to find a way to pry open a jump ring enough to slip it through the hole, add another jump ring with the hook and then close it securely.

Before I partially accomplished this task, my floor was littered with jump rings that popped from my hands and I broke two fingernails. The rings are still not secure. I am going to look for an alternative solution, but I now have some beautiful cardboard earrings!

Tuesday, September 1, 2020

Microwave: Mug O'Chilaquiles

Good Morning!

Chilaquiles is a delicious Mexican dish.

Plus, you can use your leftover stale corn tortillas.

It's been a long time since I made a recipe that was perfect the first time around and often when I make the recipe again, it just never tastes as good as the first one.

My eye jumps to Mug recipes that scroll by on YouTube or Twitter, so I was thrilled to see a mug recipe for Chilaquiles.

As usual, I did not have all the ingredients the recipe called for, like sour cream, so I made my own.


Microwave: Mug O'Chilaquiles (Toast Topping)
(Adapted from: https://www.thedailymeal.com/recipes/coffee-cup-chilaquiles-recipe )


Pre-preparation:

Ingredients:

Leftover corn tortillas
Cream
Apple cider vinegar
1 slice of multi-grain bread


DIY Tortilla Chips

Use leftover corn tortillas.Spread tortillas over on a microwaveable plate.
Microwave on high 2 minutes.
Remove.
Turn tortillas over.
Return plate to microwave.
Microwave on high 1-2 minutes.
Remove.
When tortillas have cooled, break them into small pieces.
Save unused tortilla chips and pieces in a closed container.


DIY Sour Cream

In a refrigerator container with a lid, add 3 TBspns of cream.
Add 1 TBspn of apple cider vinegar to cream.
Stir cream and vinegar together.
Cover and store in frig for 10-30 minutes.

Make toast.


Ingredients:

 
1 egg
2 TBspns milk
Ground black pepper
3 Drops hot sauce
3 TBspns mozzarella or monetary jack cheese, shredded
1 Tspn Dry onion flakes
Handful of DIY tortilla chips, broken into small pieces.
3 TBspns canned salsa, drained
Toppings: Mayo, DIY Sour cream, Dry parsley or cilantro (optional)


Process:

 
In a microwave-safe mug:
Add egg.
Add milk.
Add black pepper.
Add hot sauce
Whip together with a fork.

Add cheese and onion flakes to the egg mixture.
Stir.

Add tortilla chips and salsa.
Stir.

Microwave on high for about 2 minutes, or until cooked through.

Spread mayo over toast.

Add egg mixture to top of toast and spread over surface of toast.

Garnish with about 2 TBspns of sour cream, and sprinkle with parsley or cilantro.